Recently I was called upon to assist a customer with configuring their ISA firewall to block all traffic to or from specific country IP address blocks. Fortunately this task is made much simpler thanks to the wonderful work by Thor at
Hammer of God. At the Hammer of God web site you can
download pre-configured ISA computer sets that you can easily import in to your ISA firewall configuration.
These networks sets were exported from ISA 2006 Standard edition. If you are importing these computer sets in to the Standard version of Microsoft ISA Server, the process is very straightforward. Simply download the computer set for the country you wish to block and import them in to your policy. If you wish to import these computer sets in to ISA 2006 Enterprise, that’s a little different. ISA does not support importing/exporting objects to/from Standard and Enterprise versions natively. There is a
workaround, however. It can be accomplished easily by changing the
fpc4:Edition element in the XML export file from “16″ to “32″, as shown here…

…but that will only allow you to import the network set in to an array policy. If you would like to import these network sets in to an an enterprise policy, you can follow the procedures outlined here.
Start by downloading a network set from Hammer of God. For demonstration purposes here I have chosen the network block for the country of Albania (nothing personal against Albania, it’s just that the network set was small and convenient!).
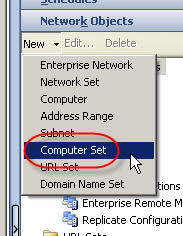
1. Create a computer set at the enterprise level. Give the computer set a descriptive name, then choose ‘Ok’ to continue.
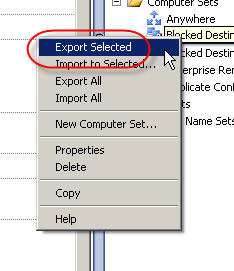
2. Hightlight the computer set you just created, then right-click on the computer set and choose ‘export selected’.
3. The ‘Welcome to the Export Wizard’ dialog box appears. Choose ‘Next’ to continue.

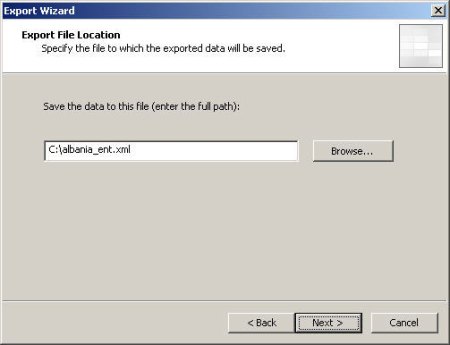
4. Specify the file name and location to save the export to. Choose ‘Next’ to continue.
5. Choose ‘Finish’ to complete the export.

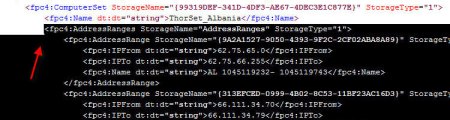
6. Next, open the network set downloaded from Hammer of God with an XML editor or Notepad. Select and copy all of the data between and including the
fpc:4AddressRanges tags…
…clip…

7. Open the blank enterprise network set export created earlier with an XML editor or Notepad. Highlight and select the entire following line:

Paste the data you copied previously here, then save the file.
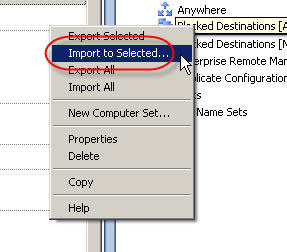
8. In the ISA Management console, highlight the blank enterprise network set created earlier and choose ‘import to selected’.
9. The ‘Welcome to the Import Wizard’ dialog box appears. Choose ‘Next’ to continue.

10. Specify the location of the file you just saved, then choose ‘Next’ to continue.

11. Choose ‘Finish’ to complete the import, then apply the changes to the enterprise configuration.

Your enterprise network set is now populated with information and is ready to be used in both enterprise policies and array policies

 LinkBack URL
 About LinkBacks


