1. First, you need to select
Start ->
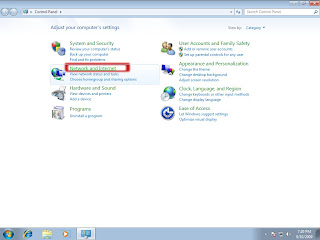
Control Panel

2. You only need to click
Network and Internet for entry next settings at this time
3. Please click
Network and Sharing Center right now

4. In this step, please click
Set up a new connection or network in
Change your network settings sector

5. During this time a pop-up window will be shown and click
Connect to the Internet
then click
Next button

6. Someone may be using Broadband router to share Internet connection for many computers, so they can connection to Internet in this while, if you can connect to Internet right now, please click
Set up a new connection anyway

7. Please click
Broadband(PPPoE)

8. Now, please fill out your account information that provided by ISP and then click
Connect

9. If your connection has been established, then you will be able to see this well-established connection through the bottom right corner click on the
Network internet access icon.

10. Sometimes you want to modify this connection profile, please click
Change adapter settings after select
Control Panel ->
Network and Internet ->
Network and Sharing Center

11. Here you can see the
Broadband Connection profile


 8سپاس
8سپاس
 LinkBack URL
 About LinkBacks


