How to Enable File Sharing between Windows 7 and Windows XP
Windows 7 comes with a great feature called
HomeGroup that makes sharing between windows 7 machines very easy. We have already written on sharing files and printers between
Windows 7 based computers here:
Unfortunately,
HomeGroup feature is not compatible with Windows XP and Vista. In this guide, you’ll learn
how to enable
file sharing between Windows 7 and Windows XP.
Sharing Files Between Windows 7 and Windows XP
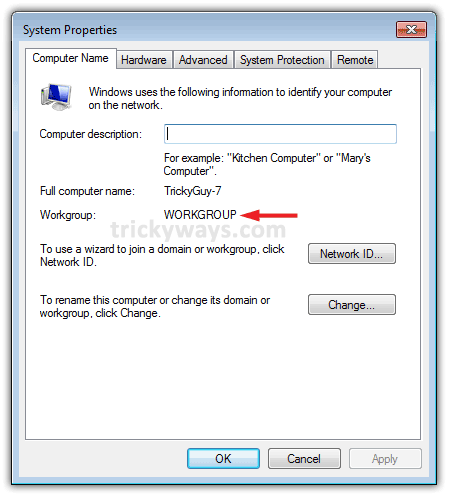
Make sure both of the machines are on the same Workgroup which by default is named WORKGROUP.
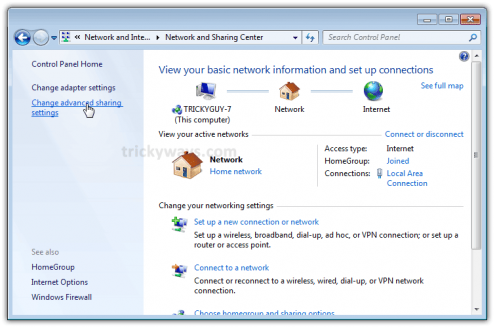
From your Windows 7 machine, go to:
Control Panel > Network and Internet > Network and Sharing Center


Now click on
Change advanced sharing settings.
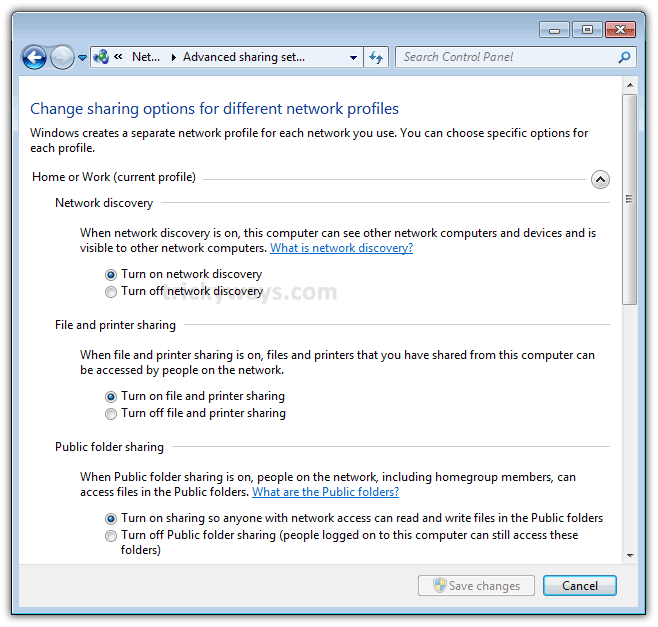
Choose your desired options under Advanced Sharing Settings for the Home or Work and Public profile.
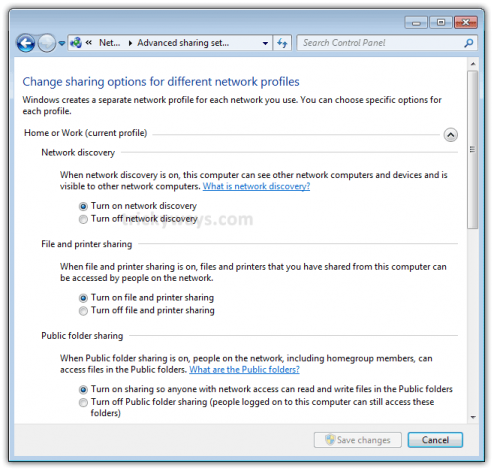
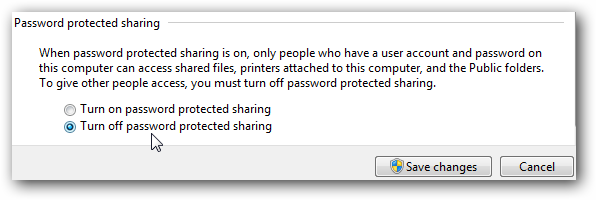
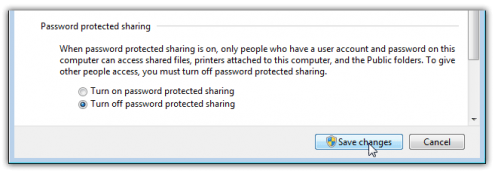
Now scroll down to the bottom of the list and choose
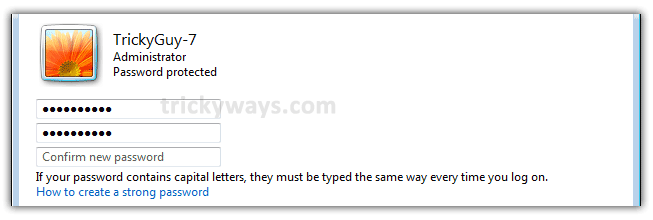
turn off password protection if you want to give access to all users to your public shares.
If you want to turn it on then only those XP machines users having a user account and password on this machine (Windows 7) can access shared files, printers attached to this machine and Public folders.
Save the changes if you made any.
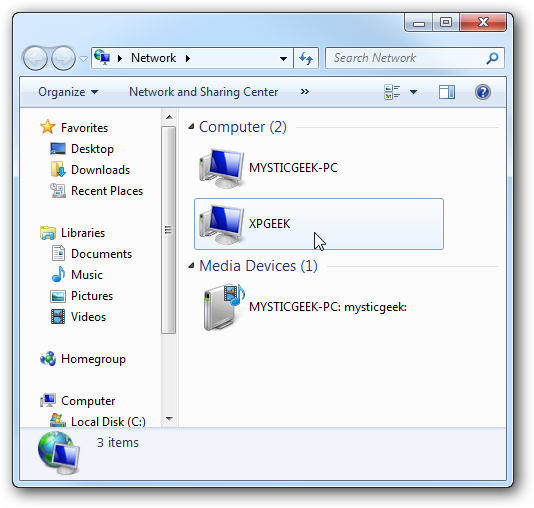
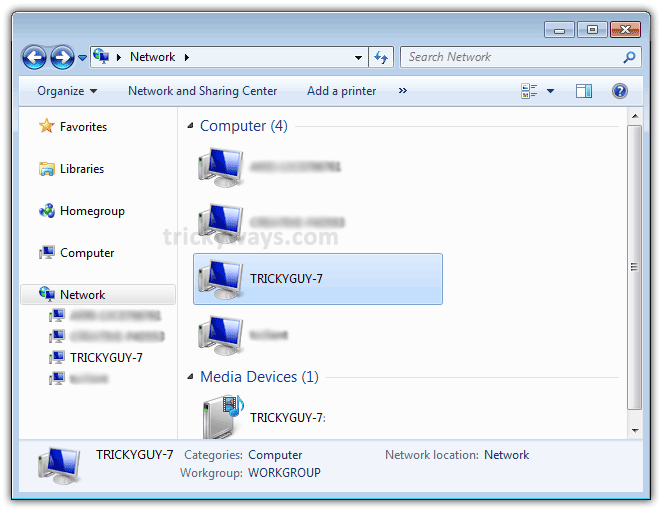
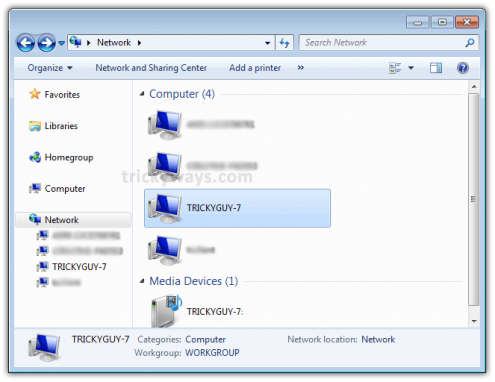
Now go to
Network in your Windows 7. There you should see your Windows 7 and Windows XP machines .
 Sharing Printers
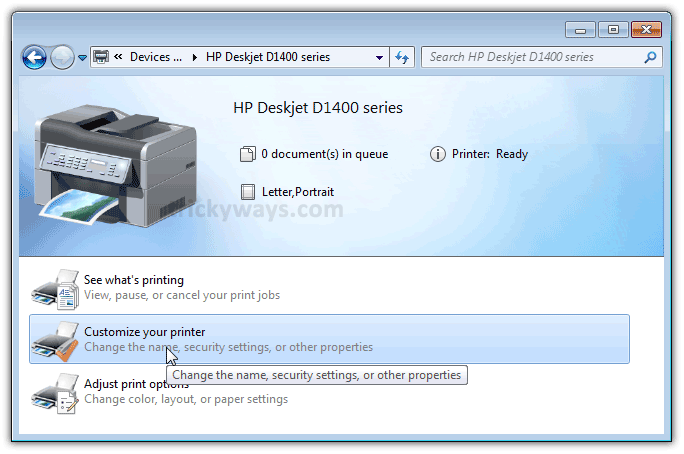
In order to
share printer on Windows 7 machine with Windows XP machines, go to:
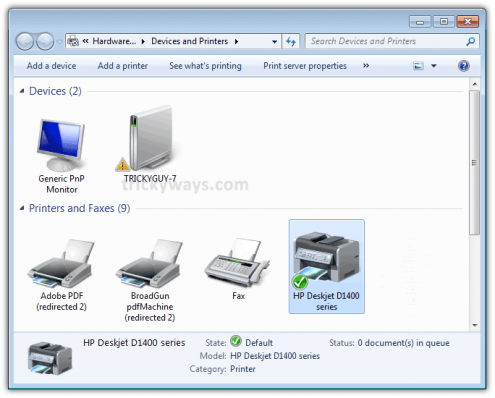
Start Menu > Devices and Printers
Now double click on the
printer icon.
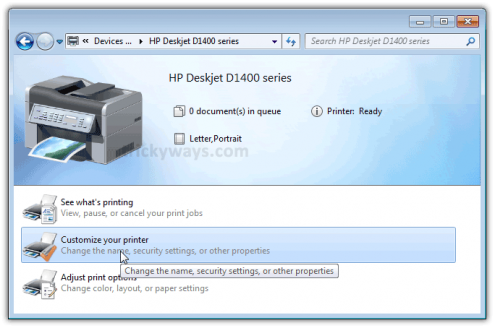
Next double click on
Customize your printer.
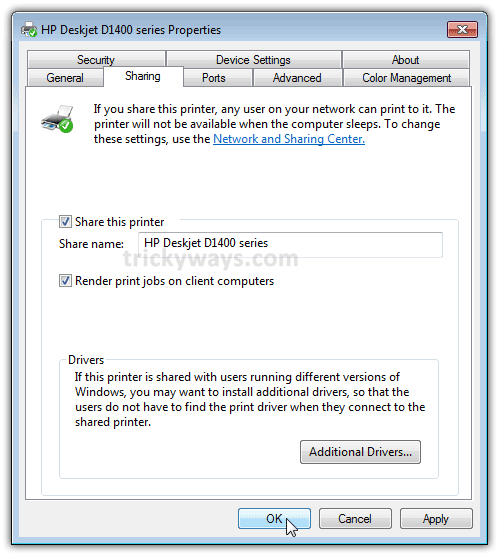
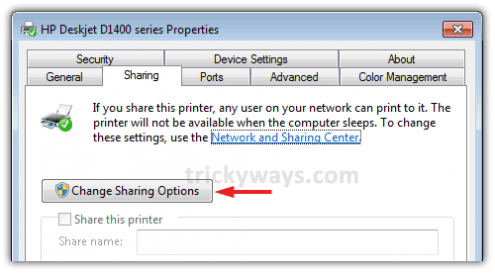
Now go to the
Sharing Tab (Click on
change sharing options button) and check the box to share the printer and type in its share name.
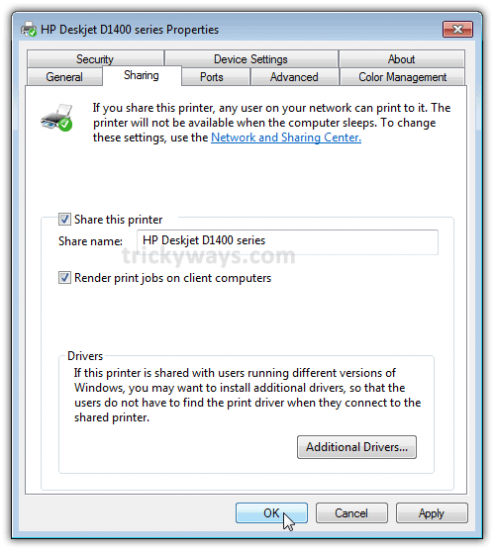
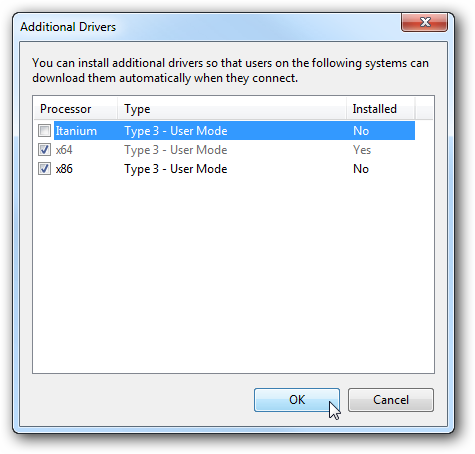
In case your XP machine is an x64 OS you can install
Additional Drivers before setting up the XP machine.

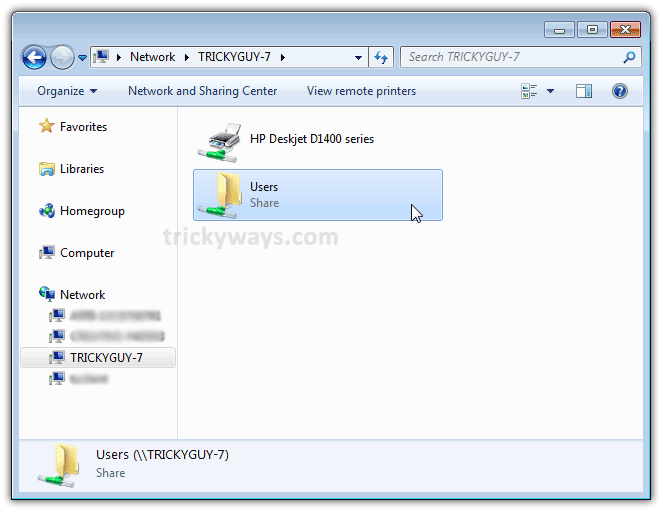
Now if you go to
Network and double click on you Windows 7 machine icon. There you will find everything you have shared from your Windows 7 machine.
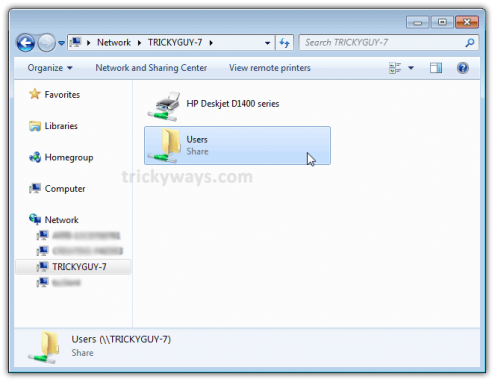
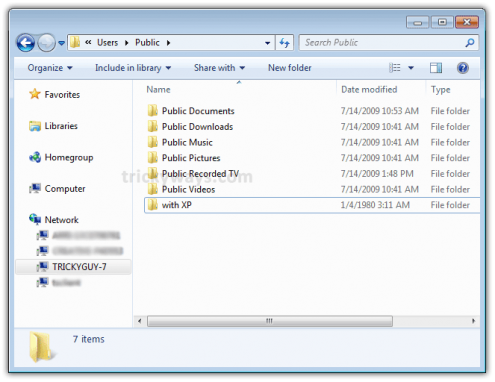
Open the
Users folder and then Public folder to see the shared items. You can create folders to keep things managed.
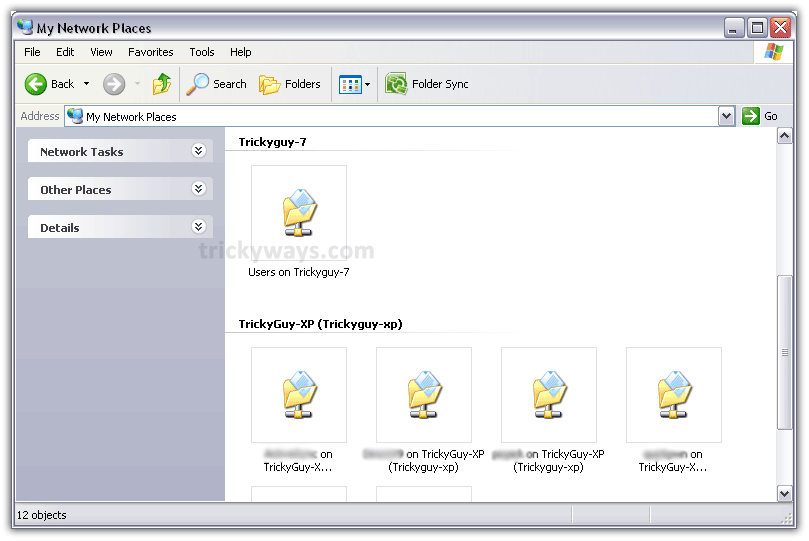
Now from your
Windows XP machine go to
My Network Places. There you’ll find
Shared folders of Windows 7.
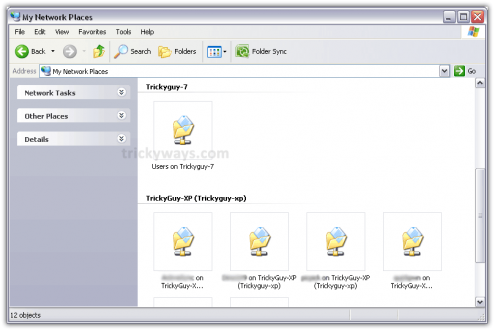
If you double click the shared folder , you’ll come up with the list of folder available in the Public folder of Windows 7.
If you’ve enabled password protection, then you’ll be asked to input a username and password for the user account of the Windows 7 machine.
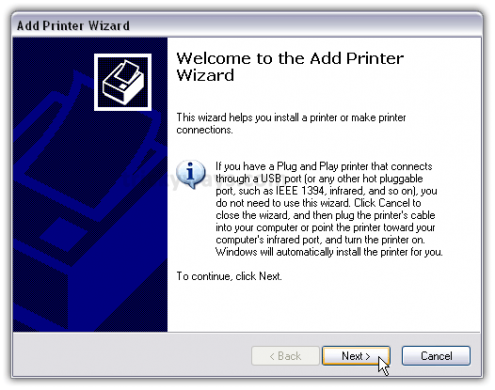
 Add a Shared Printer to Windows XP
Here we have a printer that’s connected with Windows 7 machine and is shared over the network. In order to use that printer from XP, you need to setup it in Xp first.
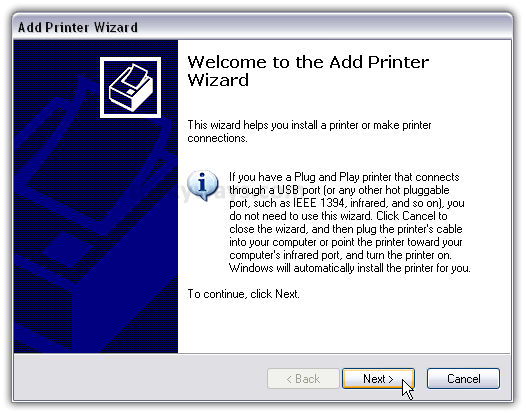
Let’s setup that shared printer in the Windows XP.
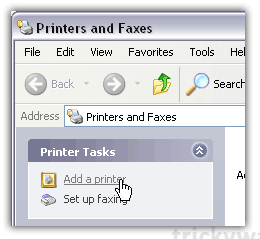
To set up the shared printer in XP, go to:
Start Menu > Printers and Faxes > Add a Printer
A wizard will open up. Hit the Next button.
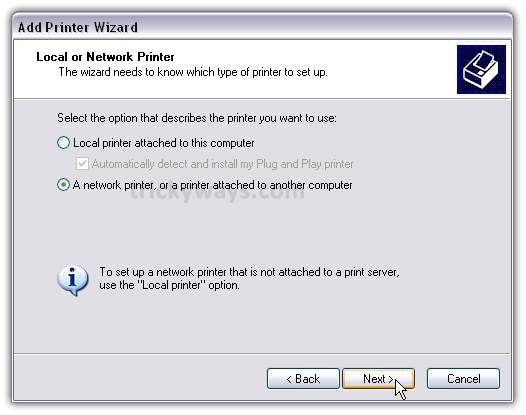
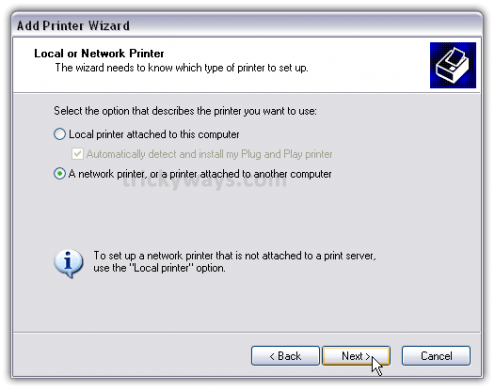
Select
A network printer, or a printer attached to another computer.
Click Next.
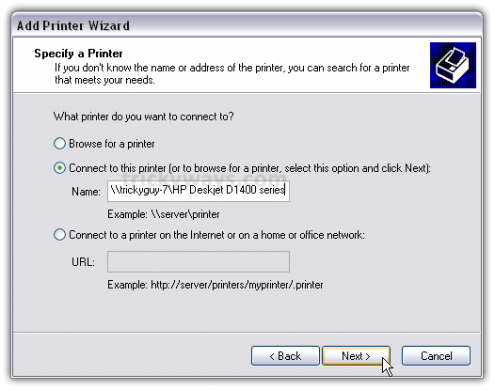
Now select
Connect to this printer (…) and type in the
path for the printer connected to the Windows 7 machine.
Hit the Next button.
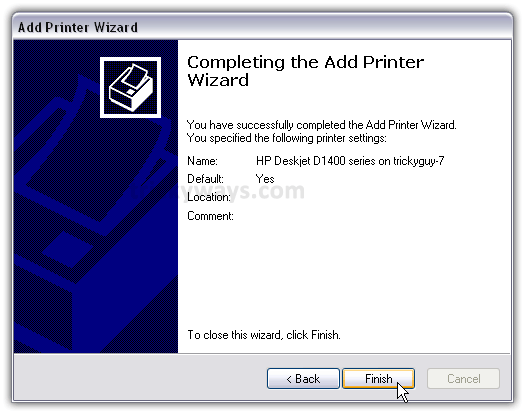
A confirmation message will appear, just hit the
Yes button.

Then finally hit the
Finish button to complete the Wizard and get the Printer installed.
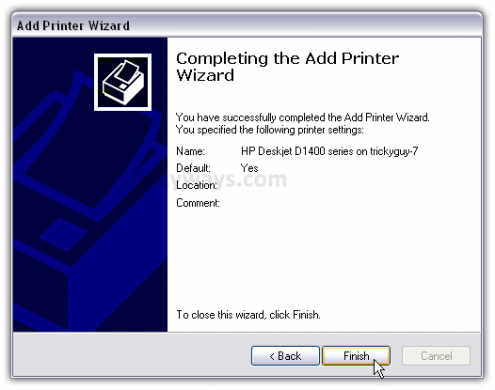
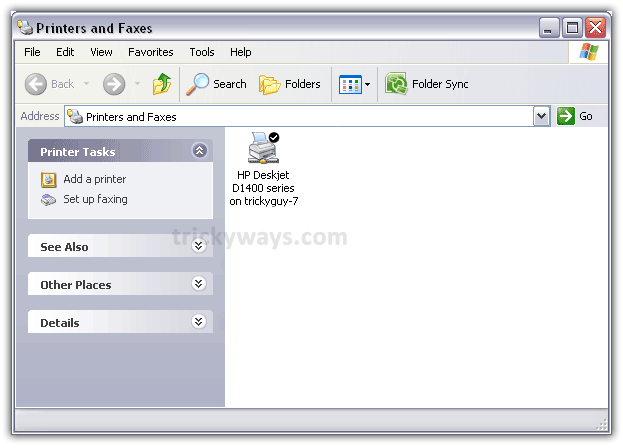
In some cases you will need to install the x86 XP drivers for the shared printer because the Windows 7 drivers are not compatible with XP. When everything is installed open up Printers and Faxes to find the shared printer.

This is it.
Now you can get started with sharing files with Windows 7 and Windows XP based machines. You might need to restart your Windows Xp machines a couple of times in order to see the shared items of Windows 7 machine.
Don’t forget to share your experience on
Sharing files between Windows 7 and Windows XP.

 LinkBack URL
 About LinkBacks