PART2
Welcome to Part 2 of this article series. In Part 1, we started off by discussing the goal of this lab. That goal is how to deploy a single Enterprise Edition OCS 2007 R2 Server which is connected to an x64 SQL Server 2008 Back-End Server. We first discussed what the lab setup is going to be using Hyper-V, and then proceeded to the configuration of our Enterprise Certificate Authority.
In this Part, I will go over the Environment Preparation.
Front End OCS 2007 R2 Server Installation
When installing OCS in a consolidated Enterprise Edition deployment, you would perform the following steps:
- Prepare Environment
- Prepare Active Directory
- Create Enterprise Pool
- Deploy Hardware Load Balancer
- Configure Pool
- Add Enterprise Edition Server to Pool
- Add Server to Pool
- Configure Certificate
- Configure Web Components Server Certificate
- Verify Replication
- Start Services
- Validate Server and Pool Functionality
Note: We will not be able to go over all the steps in this Part 2 due to the amount of steps and sub-steps required to perform.
Prepare Environment
Prepare Active Directory (Step 1)
Our Domain Controller with Windows Server 2008 SP1 is installed and fully functional. To begin the Active Directory preparation process, we can insert our OCS CD. There are some prerequisites for installing OCS such as .Net Framework 3.5 and Microsoft Visual C++ 2008, but this is all taken care of during the installation.
Insert the CD and let’s begin the installation process. You will be asked to install the Microsoft Visual C++ 2008 Redistributable. Click
Yes to
Continue.
You will then be asked to install the Microsoft .NET Framework 3.5. Click
Yes to
Continue.

Once Microsoft .NET Framework 3.5 is installed, you will be presented with the Deployment Wizard. We will want to begin preparation of our Environment. Click
Prepare Environment to
Continue.

We are now on Step 1 which is to Prepare Active Directory. If you previously had OCS 2007 installed, you will see that the preparation of Active Directory is partially done. Click
Prepare Active Directory to
Continue.

We are now presented with sub-steps to perform to complete our Active Directory Preparation. These sub-steps include:
- Prepare Schema
- Verify Replication of Schema Partition
- Prep Forest
- Verify Replication of Global Settings and Global Catalog
- Prep Current Domain
- Verify Replication of the Domain
- Delegate Setup and Administration
Click
Run for
Prepare Schema to
Continue.
If you are installed OCS 2007 R2 on a Server 2008 machine and are using this machine to Prepare AD, you will need to install the Remote Server Administration Tools due to the nature of the modular design of Server 2008. You will be quite aware of needing this installed if you encounter the following screen.

You can take care of this easily by opening a Command Prompt and typing
ServerManagerCMD -i RSAT. This will require a reboot.

Now that RSAT has been installed if you have Server 2008 and your server is rebooted, let’s restart the installation and get back to the Prepare Active Directory section. Click
Run for
Prepare Schema to
Continue.

On the Welcome Screen, Click
Next to
Continue. Select “
Default: Schema files are located in the same directory as Setup.” Click
Next to
Continue.

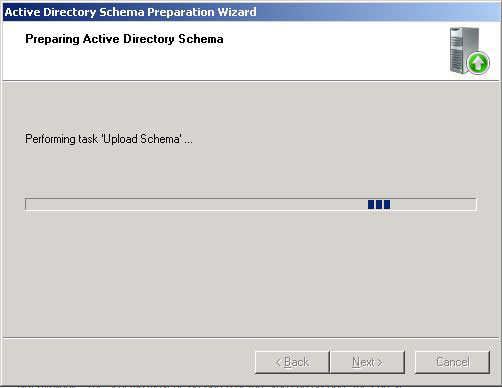
You are now ready to Prepare the Schema. Click
Next to
Begin Schema Preparation.
When the Schema Preparation is finished, Click
Finish. You will be given the option to view the log which I advise you to do to ensure everything went OK.
We are brought back to the Deployment Wizard. The Prep Schema step has been complete as is shown next to the Run button.

We will skip through all the Replication Steps (Verify Replication of Schema Partition, Verify Replication of Global Settings and Global Catalog, and Verify Replication of the Domain) due to the fact we have only 1 Domain Controller in this lab. In a production environment where you have more than one Domain Controller (hopefully), I highly advise you to ensure replication for each step has completed successfully before continuing.
We are now ready to run the Prep Forest step. Click
Run for
Prep Forest to
Continue.

On the Welcome Screen, Click
Next to
Continue.
You are presented with two options:
- System Container in the Root Domain
- Configuration Partition
To decide which option to choose, follow this diagram provided in the OCS 2007 R2 documentation with more detailed information about each selection process.

In my OCS RTM article series, I chose System container because the lab contained only one Domain Controller. My existing lab which had OCS RTM was deployed using the Configuration Partition. Because of this, we are presented with the following screen.

As you can see, since we deployed OCS RTM previously, we are unable to choose an option. If you chose System Container in a previous deployment, Microsoft has provided a tool to migrate System Container over to a Configuration Partition configuration. This tool is availabile
here.
If this is a pristine environment you are deploying OCS R2 in, you can choose either option. I would highly recommend choosing the Configuration Partition. This is to ensure availability of your OCS Data in your environment and not having to worry about 100% connectivity to your system container in your root domain to ensure OCS availability. Click
Next to
Continue.
We will want to store our Universal Groups in our shudnow.net domain. In the case of this lab, we will have to due to the fact that this is our only domain. Select
shudnow.net and Click
Next to
Continue.

We will use our Active Directory domain name shudnow.net for OCS routing. Click
Next to
Continue.

You are now ready to Prepare the Forest. Click
Next to
Begin Forest Preparation.
When the Forest Preparation is finished, Click
Finish. You will be given the option to view the log which I advise you to do to ensure everything went OK.

We are brought back to the Deployment Wizard where we will now run the Prep Current Domain. This step should be run in any domain that will contain users that will be OCS (SIP) enabled.
Click
Run for
Prepare Current Domain to
Continue.

On the Welcome Screen, Click
Next to
Continue.
On the next screen that provides Domain Preparation Information, read the excerpt provided and Click
Next to
Continue.
You are now ready to prepare the domain. Because we have only 1 domain and are running this step in our shudnow.net domain, our current settings will display as shudnow.net. Click
Next to
Continue.

When the Domain Preparation is finished, Click
Finish. You will be given the option to view the log which I advise you to do to ensure everything went OK.
The final step is to Delegate Setup and Administration. Because we are doing everything using a Domain/Enterprise/Schema Administrator account, we will not have to configure Delegation.
Creating File Shares
Because our Universal Groups have been created, we can now create file shares that are necessary for the following functions:
- Presentations – Meeting presentations to be downloaded or streamed by conference attendees.
- Metadata – Meeting information (metadata) that is used internally by the Web Conferencing Server component for the pool.
- ABS - Address Book information that is used by the Address Book Server, which is included with the Web Components Server, in order to provide global address list information to Office Communicator 2007 and Office Communicator 2005 clients on a daily basis.
- Applications – Application files that are used internally by the application server component for the pool.
- Updates – Files used by the client version control mechanism to update Office Communicator clients and by the Device Update Service to update devices.
- MeetingCompliance (optional) – Meeting activities and content uploaded during meetings. We will talk about how to enable Meeting Compliance in a future Part.
These shares can be created on a File Server in your environment. We will be creating these shares on our OCS FE Server which means that our OCS Server will also be our Web Components Server.
We will create a folder called C:\OCS on our OCS Server. Within those four folders, we will create the following six folders:
- Presentations
- Metadata
- ABS
- Updates
- Applications
- MeetingComp

As you can see, the above folders have been shared out. This is a requirement. We will use a share name that matches the folder name for simplicity sake. Grant Full Control on each of these shared folders to the Administrator, the RTCUniversalServerAdmins group, and any other user or group responsible for creating pools. Remove Read permission from the Everyone group except for Presentations since all users will need to read this folder to download Live Meeting Content and Upload Presentation Data.

Make sure you provide both RTCUniversalServerAdmins and Administrators Full Control via NTFS permissions as well. Because our folders are in the OCS folder, we can add these permissions on C:\OCS and they will flow down to our sub folders through inheritance. In production, I would assign them manually to each folder as each folder requires a different set of permissions.
Create Enterprise Pool (Step 2)
The guidance on what server you create the pool is different from R2 than it was with OCS Release 1 RTM. On OCS Release 1 RTM, if you are using an x64 SQL Server, we’d create the pool on an x86 system which would be our OCS Server most likely. In OCS Release 2, if you are using a 64-bit version of SQL Server, we need to log on to our OCS Back End Database server as a member of RTCUniversalServerAdmins and DomainAdmins group and create the pool there.. If you are using a 32-bit version of SQL Server, create the pool by using the computer that you plan to use as the Front End Server.
Because we are running SQL Server 2008 x64, we will need to create our pool on our SQL 2008 Server. Also, when using SQL 2008, we need to modify the Windows Firewall. We can d this by going to
Start >
Control Panel >
Windows Firewall with Advanced Security.
 Right-Click Inbound Rules
 and choose
New Rule. Select
Port and click
Next to
Continue.

Select
TCP and specify
1433 as a local port. Click
Next to
Continue.

Select
Allow the Connection. Click
Next to
Continue.

Select
Domain and
Private and
Clear the checkbox in Public. Click
Next to
Continue and go through through the rest of the options such as giving the rule a name.
We are now on Step 2 which is to Create an Enterprise Pool. This is where you will definitely need to have your SQL Back End fully configured. You can use SQL Server 2005 (x86 or x64) with SP1+. You can also use SQL Server 2000 SP4+. Click
Run to
Continue.

On the Welcome Screen, Click
Next to
Continue.
We must now decide what we want our Pool Name to be. On an OCS Standard Edition Server, your Pool name is the name of your server. But since we are using Enterprise Edition, we must select a name that won’t match any other existing records currently housed in DNS. We will use the name,
OCSPool. Our SQL Server was installed using the Default Instance. Because of that, all we will need to do is ensure we are logged on with an account that is a member of Domain Admins, RTCUniversalServerAdmins, and has permissions to create and manage SQL Databases. Click
Next to
Continue.
On both your SQL 2008 and OCS 2007 R2 server, make sure that File Sharing is enabled.

We can now proceed to creating our Pool. Just an FYI, as stated earlier, the documentation states that since we are using an x64 SQL Back End, that we should be creating the Pool on our SQL Server. I did initially try to run all of this on the Front End and encountered issues. So as the documentation states, since it’s an x64 Back End, create the pool on the SQL Server.

We will want to leave our Internal web farm FQDN alone. This should be the pool name. If you are going to be installing multiple Front End Servers behind a Hardware Load Balancer, the OCS Pool DNS would be pointed to your Hardware Load Balancer Virtual IP Address which would then direct the traffic to one of your Front End Servers.
The External Web Farm FQDN is used by your ISA Server. It allows you to reverse proxy (publish) your Address Book, Web Conferencing Meeting Content, as well as expansion of Exchange Universal Distribution Groups. I would recommend configuring this during the install as you cannot modify this through the OCS Administrative GUI. You can use the guide
here to modify the External web farm FQDN should you decide you don’t want to set this FQDN during install or wish to change it at a later time. Click
Next to
Continue.
Note: I used the FQDN of ExtWebFarm.shudnow.net. Taking a look at this from a perspective of a production environment, the shudnow.net name is my AD Domain. If you do not have split-dns, you can use the same namespace that you will be SIP enabling users. For example, our SIP Domain is exchange.shudnow.net. So I can easily just do ExtWebFarm.exchange.shudnow.net.

I am selecting to overwrite any existing database since I did use my SQL Server for a previous OCS installation.

OCS is smart enough to detect whether SQL has any volumes that are now the system volume. When it does detect these separate volumes, it will try to optimize the locations as much as possible. Because I do have a separate LUN/volume on my SQL Server, OCS automatically used the E:\ volume to separate the RTCDYN log from everything else. Make any changes here as you wish. As OCS comes closer to release, public documentation on Database storage guidance will become available. I will link to it as it does become available. Click
Next to
Continue.

The time has now come to specify the location of the shares we created above. These should be:
- Presentations – \\SHUD-OCSFE1\Presentations
- Metadata – \\SHUD-OCSFE1\Metadata
- ABS – \\SHUD-OCSFE1\ABS
- MeetingComp – \\SHUD-OCSFE1\MeetingComp
- Applications – \\SHUD-OCSFE1\Applications
- Updates – \\SHUD-OCSFE1\Updates
Make sure you test all of the Universal Naming Convention (UNC) paths work prior to proceeding. If they do work, enter the UNC paths as is displayed in my screenshot. Click
Next to
Continue.

Configure the remaining UNC Paths as follows. Click
Next to
Continue.

Since we will not be enabling Archiving , CDR, or QOE in our environment, leave the following settings unchecked. Click
Next to
Continue.

We are finally ready to create our Enterprise Pool! Review your Current Settings. When satisfied, Click
Next to
Continue.

When the Pool Creation is finished, Click
Finish. You will be given the option to view the log which I advise you to do to ensure everything went OK.
Deploy Hardware Load Balancer (Step 3)
If you are going to be doing any type of redundancy, you will need to use a Hardware Load Balancer such as an F5 BIGIP with the LTM Module.
The steps required to configure a Load Balancer is out of the scope of this article as we are deploying a single Front End server which does not require a Hardware Load Balancer.
The hardware load balancing planning information will be linked to as documentation becomes available.
The hardware load balancing deployment information will be linked to as documentation becomes availble.
Note: One thing that is important is that DNAT is no longer supported on a Front End Pool configuration.
Configure Pool (Step 4)
We are now on Step 4 which is to Configure our Pool and Configure DNS. You can resume your OCS installation on your Front End Server. Click
Run to
Continue.

As stated previously, we will be using a SIP domain that is different from our Active Directory domain. This SIP domain is called exchange.shudnow.net. The reason I am doing this is to show you how you can set up your SIP namespace to be different from your Active Directory domain which is not uncommon. For example, in many organizations, their domain may be domain.local while their SMTP namespace will be domain.com.
The method I am using would be the same thing. You would have an Active Directory domain, and then use a different namespace for SMTP/SIP. In the case of our lab, I am only using Exchange to show distribution group expansion within OCS. But in a production environment, you can use the same namespace for both Exchange and OCS. This is the actually recommended.
Note: A person by the name of Simo notified me that Exchange is not required for group expansion. As long as your distribution group has a value in the “mail” attribute field, group expansion will work.
So just to ensure you understand, let me show some examples:
Example 1:
- Active Directory Domain Namespace- shudnow.net
- OCS Namespace – shudnow.net
- Exchange Namespace – shudnow.net
Example 2:
- Active Directory Domain Namespace- shudnow.net, shudnow.local, staff.shudnow.net, staff.shudnow.local, etc…
- OCS Namespace – exchange.shudnow.net (can be different from Exchange Namespace)
- Exchange Namespace – exchange.shudnow.net (can be different from OCS Namespace)
On the Welcome Screen, Click
Next to
Continue.
You will then be prompted to install the Core Components since no other OCS components installed on this server. You don’t have much of a choice here and you must install these tools. Click
Next to
Continue which will begin the installation process of the Core Components.

We now must choose what Pool we want to configure. Considering we only have one pool, leave the selection (don’t have much of a choice) at OCSPool.shudnow.net. Click
Next to
Continue.

The following four options are dependent on what services you will be deploying in your environment. The first two Conferencing options are utilized when using Dial-in Audio Conferencing. The Response Group Service is used if you want to route calls to multiple participants. The Outside Voice Control is used to allow Communicator Mobile Edition access to Voice which is used if you want capabilities such as Single Number Reach, Least Cost Routing, Etc…

We are now presented with the SIP domains in our environment.

Since we will be using exchange.shudnow.net, we will need to add that in there. Do not remove shudnow.net as a SIP domain. If you recall, when we did our Forest Prep, we chose our Active Directory domain for SIP Routing. Because of this, we will have two SIP domains; one for routing and one for user access. You will then want to type in
exchange.shudnow.net and click
Add. Click
Next to
Continue.

When you set Communicator to connect to your OCS pool, you can configure it to automatically connect or to manually connect. We will configure OCS to allow for automatic client logons. If we had multiple pools and we wanted users who connected to this Pool to be redirected to another Pool, we would ensure that “Use this server or pool to authenticate and redirect automatic client logon requests” is checked. Click
Next to
Continue.

Since we are enabling our Pool to allow automatic logons, we must specify which SIP domains will be allowed for automatic logons. Choose
exchange.shudnow.net and then
Next to
Continue.
Note: We will not be doing the actual DNS configuration to support our new SIP namespace until we get to the part where will be connecting via Communicator. This way, you can see step by step what fails and how to rectify the failure to ensure a successful automatic logon.

We do not have our Edge Topology up and running. The recommended method of deploying a new OCS organization is to bring up your internal servers and then your Edge Servers. If you are migrating from OCS, you can configure external access as an OCS R1 Edge Server can proxy data to an OCS R2 Front End Server. In fact, the migration strategy for OCS R2 is inside out. Select, “Do not configure for external user access now” and then
Next to
Continue.

We are finally ready to Configure our Enterprise Pool, you can review your Current Settings. When satisfied, Click
Next to
Continue.

The configuration will now commense which will be pretty quick. In fact, it’s too quick for me to grab a screenshot. When the Pool Configuration is finished, Click
Finish. You will be given the option to view the log which I advise you to do to ensure everything went OK.
Summary
Well folks, that is all for Part 2 of this article. For Part 3, I will go through the initial configuration of the pool, certificates, and adding our Front End Server to our newly created pool that uses a SIP namespace (exchange.shudnow.net) that is separate than our AD Namespace (shudnow.net). We will begin the steps needed to validate our configuration to make sure the Front End OCS Server is healthy.

 LinkBack URL
 About LinkBacks

